Showing posts with label veganmofo 2009. Show all posts

Saturday, November 21, 2009

Green and Yellow Bells + Italian Frying Peppers

I've had this post half done for weeks, and just not gotten around to finishing it. I've also got several more on backlog about hot peppers and dehydrating, plus a couple of other topics. The good news is, there is plenty to keep this blog going through the winter months. Then, before we know it, it will be time to start buying seeds and growing them indoors next winter!


So, today let's finally take a look at this season for sweet peppers like Bells & Italian Fryers.

It was actually a pretty terrible year for peppers. Without a doubt, my Italian frying peppers and hot peppers did better last year. The bell peppers didn't do so hot last year either, b/c I'm pretty sure there is something lacking in my soil that they need. But, that said, despite the cold and rainy weather in the beginning of the summer, and bouts with blossom end rot (or something), I still got to eat some sweet peppers.

I bought three flats full from the nursery, which only came in packs of 6 so I had 6 green bells, 6 yellow bells, and 6 Italian Frying peppers. They barely fit in the garden. What you see on the above left is two rows of the Italian Fryers immediately behind the basil on the left side of my garden, and then a row that was half green and yellow bell behind it.

Here on the right is a close up of the Italian Fryers on Oct. 4th, which are tiny. The big difference from last year was that I kept picking all through August and Sept last year, but this year not so much. I wasn't really able to pick them until right before frost, since they weren't exactly ripe.

Then, on the other side of the garden I had the rest of the green and yellow bells (along with all the hots). Here they are on August 1st, still pretty small:


Then, a not so great picture of them (best I have), again on Oct. 4th:
They're definitely bigger, but still struggling. They were a bit better looking than this a few weeks earlier, but after a few bad rain/wind storms, most of the branches fell off. It seemed as if the peppers were too heavy and pulled the branches down, even though they had some bamboo supports. I'm guessing this is because the plants had such a slow start, the foliage was small, so it just wasn't enough to support the weight of the peppers when they finally grew.

The biggest problem was with the Yellow Bells. The green ones were fine, but until early October I couldn't get a yellow bell to ripen without a blemish. You can see the problem below. On the left is the yellow color the peppers should be, but it has those weird brown spots. On the right is the unripe version of the yellow bell, which looks fine. I had to compost so many b/c of brown spots that I ended up just eating them while they were still light green. Which wasn't that bad - they still tasted fine. I just really need to get a soil test to figure out why this is happening.
But, as I said, I was able to harvest at least enough to use in various recipes over the summer. In fact, the brown spot problem seemed to decline over the season - which is exactly what happened to my peppers last year, so that's why I think it has to do with the soil, and not just the bad weather.

You can see here finally, on Oct. 10th, a yellow bell actually ripened fully without a single brown spot! WUHOO!


And really, who uses that many bell peppers anyway, right? They're usually either roasted or diced up in the trinity, not really a stand alone ingredient. Even with a crappy harvest I had to slice and freeze a whole large baggie full of peppers. I also used them in sauces, and salsa.

Then I even got to make my absolute favorite green pepper recipe, which is another one of these recipes that is so simple yet so good. It is just:

2 tsp olive oil

2 cloves garlic, minced

1 green pepper, minced

1 bay leaf

2 cups cooked black beans

1 tsp dried sage (or 3 tsp fresh)

hot sauce, to taste

All you do is put a bit of olive oil in a pan, then saute the garlic, green peppers and bay leaf until the peppers have just begun to soften, about 4 minutes. Then add the beans, sage and hot pepper sauce and saute until heated through, about 3 minutes. Serve hot as an appetizer or side dish with garlic bread, corn tortillas or even corn bread. It is even good cold the next day!


I also made stuffed peppers for the first time ever. I used the recipe in Veganomicon for Creole Stuffed Peppers, except instead of 2 cans of black eyed peas, I used half bep & half brown rice. Now, stuffed peppers is something I would have never eaten growing up - just seemed so yucky. But wow, were these delicious!! I've even made them again since then. They are definitely now in my regular rotation. 
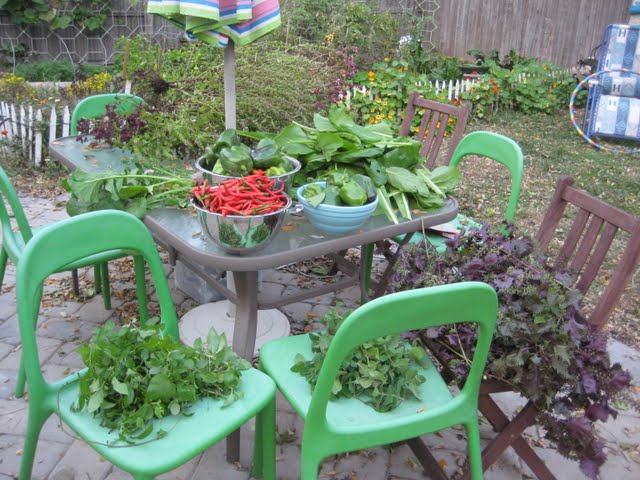
Finally, in the end, I still picked more peppers than I knew what to do with. The harvest before frost was overwhelming, as pictured here and here. I gave a huge bag to my neighbor, dehydrated some, stuffed some more, made a double batch of pepperonata from Nonna's Italian Kitchen - half we ate with polenta and the other half I froze- and still have two bags left in the fridge! Luckily, my Mom gave me some green bags, which do seem to work. I hope to roast them on the grill today, then freeze them. Phew! Here's two pictures of the dehydrated peppers, before and after:


Next year, I don't think I want 18 pepper plants! If this was how much they produced in a bad year, I'd be drowning in them in a good year! I think I might try buying seeds and starting them myself. That way I can have several different types of peppers, but only 2 plants of each type, not 6.

Thursday, October 29, 2009

Big Fall Harvest

Wow, I can't believe how much I picked today, and I didn't even get to any flowers.

Here it is: bell peppers, italian frying peppers, lots of hot peppers, mustard greens, a couple radishes, basil, two kinds of mint and shiso leaf:
The peppers and mustard greens I can handle, but the mint and basil are going to be tough. I've got to pick all of the good leaves off individually, then dry them. That's a lot of picking. Uggh. I better get to it. At least I'll have plenty for the winter.

Also, here's a quick pick of my new dehydrator in response to Chris' comment:I'll be using it to dry everything.

Do I love my garden or what?! Took the day off edition

You might remember this "Do I love my garden or what?!" post from last year's veganmofo. Well, it is kind of interesting to reflect on - things are looking better this year, what with my Agribon rowcovers instead of sheets.

Still, I took today off from work (it was a slow week, so my boss was fine with it) just to work in my garden haha! It is bright and sunny, about as good as a fall day could be. Although we haven't had a frost yet (very unusual) we've had extended cool temperatures so things are starting to show signs of dying. The leaves on the herbs are turning brown, which I definitely don't want since I am trying to dry and preserve them for winter. I have a number of things I want to get done:

  1. harvest and dry the hot peppers (habanero & kung pao, mainly. The jalapenos still haven't turned red)
  2. harvest and dry herbs (shiso, oregano, marjoram, eucalyptus, sage, mint, chives & lavender)
  3. harvest and dry the edible marigolds
  4. harvest the nasturtiums and make something with them for dinner
  5. pull down the malabar spinach. It has spots all over it now, since it is a tropical plant I think it is hating the cool weather
  6. sew the extension onto the agribon covering the lettuce bed
Jeesh! It is a lot for one day. I've also got to clean my house since I'll probably have people over for a Halloween party this weekend, and I need to put another coat of plaster/joint compound on a drywall project in the upstairs bathroom. I'm sure I won't get everything done, but, I'll try my best.

Saturday, October 24, 2009

Fordhook and Rainbow Swiss Chard

This is a picture of my strawberry/swiss chard bed on Oct. 11th. The strawberries are in the middle, and the chard is in a row at either end. Right behind the fountain is a row of Fordhook Giant Swiss Chard, and in the back, a row of Five Color Silverbeet Rainbow Swiss Chard. Last year I grew the Rainbow, but it grew quite slowly and never got that big, although I did get a few harvests and it was tasty (plus pretty). So this year I decided to try the Fordhook Giant, which was recommended for my area by the local Master Gardener program.

Well, it surely lived up to its name!! I couldn't believe the gianormous leaves I harvested from those plants. To the left is a close up with my hand on a leaf for size comparison.

I've gotten at least 3 or 4 nice size harvests off the plants so far, and there is plenty left. They're also biannual, so I'll probably be able to harvest them again next year.

I still have a few plants alive of the Rainbow from last year in another spot in the garden (now under the row covers). Unfortunately, they did get attacked a bit by leaf miners, pretty much chard's only pest. It is amazing how the critters manage to zoom in on their favorite plants so quickly, when just last year my yard was only weeds! At least so far, the leaf miners haven't touched the chard in the strawberry bed.

At first I was a bit worried that the chard would be bitter with the huge size of the leaves and dark green color, but to my pleasant surprise they were amazingly tender and delicious! You can see the last harvest I picked to the right, on the same day I cooked the Italian Brunch described in the last post. Most of it is the Fordhook, with just a bit of the Rainbow that's reddish-purple. It did also grow in yellow, white, and orange-y colors.

I often use chard in cooking in place of spinach. Personally, I like it even better - it tastes mild and delicious to me. I'll put it in tomato sauces, veggie sautes or even lasagna.

Most often though, I just saute some minced garlic in a bit of olive oil, (and sometimes red pepper flakes) then throw the roughly chopped chard in until it just wilts. Then I squeeze on a generous amount of fresh lemon juice, and maybe a bit of salt and cracked pepper. Simple yet outstanding as a side dish. That's how we ate it that day at brunch. Here's a picture:

Sunday, October 18, 2009

Four Season Harvest "Chenilles" Low Tunnels Completed

Just finished building two low row covers for my winter crops. I did it as described on page 89 of Eliot Coleman's book, "Four Season Harvest". Apparently this is a French innovation - to have little loops on each hoop so you can tie a rope to hold it down, rather than burying it with dirt. This makes it easier to harvest and vent.

I used #9 wire, and bent it into a semi-circle shape a little longer than he said, actually 8' long instead of 6.5' since my beds are wider. (approx. 40 - 42" rather than 30 - 36" he calls for) I used needle-nose pliers to put a loop about 1.5' from each end, again a bit longer than he called for (1'). It needed to be longer to accomodate the cinder blocks. I pushed them about a foot into the ground on either end.
Then I laid the #30 Agribon over it. (actually this was better as a two person job, and Mr. Aubade helped a lot - both with cutting and shaping the hoops, then with laying down the fabric) I finished it by tying poly outdoor rope like a shoelace through each loop.

The first one came out too short, so I've got to staple on about 2 feet more. It had lettuce, arugula, mache and mustard greens in that bed (not pictured).

But the second try, as seen here in the pictures, seemed to work pretty well. This bed has carrots, chard and turnips in it. It didn't come out quite like I had hoped, as it seems a little wobbly - but I think it will be ok since my backyard isn't too windy. Guess we'll see how it goes. This is definitely an experiment. I just want to see how long the plants will live.

Saturday, October 17, 2009

Nuts about Nasturium

I just absolutely adore these flowers!! They grew so beautifully this year, it went far beyond my expectations.

My garden is edged with a gorgeous array of spicy edible plants. It makes me smile every time I go outside to see these bright and sunny flowers.

Even on rainy days, they are so brilliant amongst the green they practically glow. None of the pictures I've taken capture this effect as intense as it is in person.

Who needs skittles when you've got Nasturtiums? They're a real rainbow of flavors.

They grew in various shade of yellow, from pale cream tinged with peach, to solid buttery, sunshiny yellow through neon bright yellow with red or orange triangles inside the flower. There is also bright orange, and a beautiful deep ruby red. I also love how the leaves look like little lily pads. One plant is a lot frillier than the rest - I'm not sure if it is another type that got mixed in with the packet of mixed climbing rainbow that I bought.
But the red is definitely my favorite. I am going to try saving some of these seeds for next year.
This weekend is going to be all about trying to save these beautiful plants before they're destroyed by frost. I'm thinking of drying some using the new dehydrator, but can't find too many things to do with them. I think I am going to invest in a Sunwave flower press, so I can make cards and other crafts for christmas presents. But in the meantime it looks like next week will have to be chock full of eating various nasturtium dishes. I've found a ton of ideas!


Aside from just tossing the blooms in a regular salad, this Apple and Sprout salad looks great (and could use some of the season's best fruit if it stops raining long enough to go to the nearest u-pick or farmers market).

This looks like a decent recipe for stuffed flowers, but probably instead of tofutti I'd use my homemade almond chreese. Another recipe for blackberry stuffed flowers features maple sweetened tofutti. I can't quite imagine a sweet stuffed blossom tasting that great, since they are quite peppery. But maybe next year when my blackberry bush is ripe I'll try it out anyway.

Nasturtium & Grape salad seems like a good basic salad but with a yummy twist (the grapes). Here is an even simpler fruit salad featuring strawberries. I should have made this green bean and tarragon salad before my haricot verts gave up the ghost, since it would use them and some of the huge tarragon plant I've got but never know what to do with. Well, there's always next year.

Of course there is the ubiquitous nasturtium vinegar idea - that recipe looks better than most I've seen around the web. I'm not going to bother with a pickled nasturtium seed recipe, since there are so many on the web and I don't plan on doing it this year I don't think.


Then there's nasturtium lemon butter, or a jalapeno nasturtium aioli that sounds amazing! I'd have to try one of these vegan replacements for the egg, such as jarred mayo or cashews, tofu or maybe white beans.I also just came across this lovely PDF press release about 15 - 20 foot long nasturium vine displayed at the Isabella Stewart Gardner Museum. Apparently it takes them 10 months in the greenhouse to grow these vines, and they've been putting them on display for visitors since 1903. I would love to try one of those recipes, perhaps lavender nasturtium syrup. And now I must visit Boston in April!!

I really like this idea, "for a tangy alternative to chives, chop nasturtium leaves finely, and sprinkle them over a jacket potato. " Sounds easy and baked potatoes are a freqent favorite in my house, so this is definitely one to try.

I definitely need recipes for the leaves since there are soo many about to succumb to frost. This pesto looks interesting. Here's another idea: nasturium leaves wrapped around sundried tomato, flowers & basil almond chreese stuffing, tied with a chive.


Here's a recipe for Nasturtium potato soup that would use up a lot of leaves, although I have to say it doesn't look like it would be very tasty from the list of ingredients. Although this soup recipe from epicurious also seems rather plain - perhaps the nasturtiums add so much spicy flavor you don't need much else. This carrot and nasturtium soup looks a little more interesting, though I'd probably be too lazy to do carrots four ways for it. I guess the only thing left to do is try them and find out.

Now for something completely different: Nasturtium pizza or how about nasturtium tostadas? OOh! I could even make Emeril's nasturtium risotto for Food Network Fridays!


Of course my list of recipes wouldn't be complete without some nasturtium tea sandwiches. This one with cucmbers looks delicious.

Wow, there's even a recipe for nasturtium bitters! And a hair conditioner that uses dried flowers. Doubt I'll be that adventurous this year, but maybe some day...

Ok, now that I've officially gone nuts and compiled enough nasturtium recipes to last a lifetime, we'll just have to see what comes out of the kitchen over the next week.

Guess What? Yep, More Super Squash!!

Just look at these things!! They measured a full 32" long. The one on the right I definitely left on the vine too long, but I was super busy with those darn reports (which are finally done!) and just couldn't get to it fast enough.

I made the one on the left into an awesome lasagna. I didn't use any recipe - just made it similar to the way I always make my lasagna for Christmas dinner, except I used a mandolin to make 1/8 inch thick long ribbons, and used those instead of lasagna noodles. Then I layered it something like the following list:


  1. Squash ribbons
  2. sliced fresh-picked Rutger's tomatoes
  3. Italian frying peppers and diced onion
  4. fresh herbs including thyme, marjoram & oregano
  5. tomato sauce
  6. a few big leaves of chard
  7. cashew ricotta from veganomicon
  8. lentils
  9. more squash ribbons
  10. Italian frying peppers and diced onion
  11. more herbs & sauce
  12. chard again
  13. cashew ricotta
  14. lentils
  15. halved grape tomatoes
  16. a layer of basil
  17. the last of the squash ribbons
  18. more ricotta, a couple dehydrated grape tomatoes, crushed black pepper and chreesy almond sprinkles on top
Then I slow baked it till everything was tender. It was sooooo good, you could barely even tell it was squash and not pasta. I would definitely make this again.
The rest got dehydrated for later use. It made a boatload! I figure I can puree it into soup. Some I could even eat as chips. Others I dehydrated in the ribbon shape may even be able to be reconsituted and made into another lasagna. I don't have a good picture of the result, except in a group shot with the other stuff I dried. But it will show up sooner or later in another post.


The best thing of all was when I came home from grocery shopping last Saturday, my neighbors called me into their yard. They wanted to know if the squash that came over their fence was ready to pick! I couldn't even believe it...luckily I had my camera in my bag so I could get a few pics. As you can see, just one huge squash was suspended through the fence. There was only 4 little leaves - it wasn't even a whole vine that had climbed over. Somehow just the squash grew through the slats. Once again, this squash managed to amaze me. I love it! I told them they could prepare it any way they would regular zuchinni. I had already given them some of the bread I'd made, and they said it was really good. I can't wait to find out what they made with it.

Thursday, October 15, 2009

Japanese Purple Shiso (a.k.a. Perilla)


The shiso started out innocently enough.

Here it is on May 29, right after planting.


Cute, right?


And now, here it is on October 6th, MONSTER PLANT!!! It's trying to take over. And this is even after I trimmed off about 1/4 of it. Well that's ok. I've got it back there with the crazy other mint anyway. I left the flowers on it this year too, because it is an annual and I'd like it to self-sow for next year. Hopefully it won't be too hard to control! Guess we'll see..
Mostly I've just been tucking it into sushi. But one night I actually made something with it, and couldn't believe how delicious it was! It looks a little strange, what with the dark purple color, but it has such a lovely delicate taste. I had 2 cucumbers left from the garden so I chopped them, then sliced two big handfuls of shiso leaves into 1/4 ribbons and mixed them in a bowl.

For dressing I whisked together 1 tsp umeboshi plum paste, 2 tsp sesame oil, 1 tsp sugar and about 6 tsp rice vinegar (I like my dressings more on the acid side, plus I'm still trying to keep the oil amounts down for my diet). It was simple but really delicious. I love this plant!

I think I will also dry some to preserve them over the winter.

DIY Solar Cooker

So last night I was just about to fold up and put away that good ol summer staple to prevent burning hot steering wheels - the silver windsheild shade - when I remembered seeing this website: http://solarcooking.org/plans/windshield-cooker.htm.

Aside from being a really wonderful organization that helps people in developing nations, the site has detailed plans to build a solar cooker out of the shade. Supposedly, it will get as hot as 350 degrees F, and cook your food almost just like a regular burner.


I first saw the plans years ago, and thought it was such an intriguing idea. My mom is forever buying me these things for my car, which usually end up lying aroud unused, just like the one I was about to put away last night. It would be soo cool to set it up in the garden and cook some veggies with nothing but the power of the sun. Especially now that I was the Solar Energy Garden Spirit in the Earth Celebrations Pageant, I've got to try it!

I resolved not to put it away and to try it on the next sunny day that I'm home. According to the FAQs on that site, you can do it even way up in Canada all but the three coldest months of the year, so I think I still have a little time to try this experiment.

Unfortunately it probably won't be this weekend, since rain is predicted until Monday. But in the meantime I'm at least posting this so I won't forget. Stay tuned for another post about the results!

Raging Mint and Its Best Friend Corn

This is just a quick post to catch up for vegan mofo. Although it is a super simple dish, minted corn is one of my favorite things to eat. It makes the corn so sweet, you barely even need butter (well, Earth Balance).

Unfortunately I don't have enough room to grow corn, but I sure do have a lot of mint! In the lower right of the picture above is pineapple mint, which I planted last year. Right behind it is white mint that grew from one tiny little plant I purchased in June.
For a minute last year I didn't think the pineapple mint was going to grow back. I thought all those people who say mint is invasive were lucky, since mine was so small. Well, obviously I was wrong! It is growing like wildfire now. Some of it jumped out of the bed and started growing all around the gutter's drain pipe. I'm glad I put it in the back corner, so I'm not too worried about it. At least we'll have plenty for mojitos!


To make the minted corn, I just throw a sprig of mint (above you see the white mint) in an inch of two of boiling water, and then put the corn in a steamer basket. About 10 - 12 minutes later, it's done. I still remember the first time I read this recipe was when I lived in Seattle in 1997. I thought it sounded so weird, but I had my first herb garden in the backyard there so I tried it. I've been eating corn this way every since. You've got to try it to believe it.

Saturday, October 10, 2009

Tomatoes in October

So there the tomatoes are, on October 3rd - in all of the garden's late fall glory. I just love how the climbing nasturtiums are growing up amongst them.

I'm also glad the tomato cages we built worked well. Sometimes it was a bit hard to fit my hand or the bigger tomatoes through the smaller holes, but not too bad. As you can see they haven't rusted at all so I think we'll get many more seasons out of them. Over the winter I think I'll cut some more big squares to fit my hand through, and use a dremel to file the sharp edges - since I did get a few scratches from the cut wire edges this season.
Above is little bit more close up - I know it doesn't look like much more than a huge tangle in these pictures! You also don't see many ripe ones because I had picked them all just before taking the picture. I dehydrated those as an experiment in my new dehydrator, which you'll see the results on in one of the next posts.

You can also see the plants got kind of brown towards the bottom. That actually started happening over a month ago, so it isn't just normal late season browning. I think that was also caused by the terrible weather earlier this summer.
Mr. Aubade picked more all throughout the week, that we ate with tacos and in salads. And here is the harvest I got today - along with two more amazing squash!! Can you even believe these things?? I actually got out the measuring tape this time, they were a full 32 inches long!! I'll also post more about these later.

Now let's check out a close up of each individual plant, all taken last weekend on October 4th. First, the Roma:


Here's the grapes - yellow on the left and red on the right.


Finally, here is the Rutgers. Most of the green towards the top of the left picture is actually the red grape that grew over onto the Rutgers cage. It is really just the little curled up plant towards the bottom. And the big red ones on the right are what I picked today that are pictured above.
Creative Commons License
Grow Peace Dance is licensed under a Creative Commons Attribution-NonCommercial-ShareAlike 3.0 Unported License.
Based on a work at grow-peace.blogspot.com.