Wednesday, October 29, 2008

Nasturtium: Here Today, Gone Tomorrow

They were pretty for a minute. Tasted good too, spicy yet floral. Unfortunately, this picture captured them at their very best 5 inch tall glory. A few weeks later they died. I'm not really sure what happened. The only thing I can think of is that they were in a hanging planter on the porch, and I wasn't very good at watering them. They only got partial sun up there too. I'm determined to give them another try next year, this time in the ground and full sun.


Tuesday, October 28, 2008

Turnips are the Tops!


I think the first time I ever ate a turnip wasn't until I was around 17 years old, and I've eaten them only one or two times more since then. No reason why really, as I thought they were delicious mashed (the only way I ever had them). I guess just not having grown up eating them, it doesn't often occur to me to buy turnips instead of potatoes. But, I read that they were easy to grow and good for cool weather, so in the fall garden bed they went. I am so glad!! Not only did they look gorgeous growing as the pictures above attest, they were indeed very easy to grow and produced a good harvest.

The two photos below show the whole harvest. On the left they are in three rows organized by turnip size- tiny, medium and large. I think the problem why many of them came out so small was because we didn't really thin the seedlings so they were too close together. I am not good at thinning plants at all. I guess I just hate to kill them! But next year I will definitely try harder because it clearly was a problem in the garden this season. The turnips on the right were picked a few days later. So altoghether I'd say it was around 20 nice sized turnips. The unblemished, creamy white and purple globes were'n't even remotely comparable to anything I'd ever seen in the grocery store either.


I made them all into a huge crockpot of Susan V.'s Chickpea and Turnip Stew with Ethiopian Spices for a fall garden dinner party. I think at first my friends thought it was a little bitter, but there was so much food that day I didn't eat any. Later in the week though I enjoyed it very much! I would make it again for sure, and can't wait until spring to grow more turnips and mash them too.


Monday, October 27, 2008

Oh So Jolly Jester Marigolds

What a happy little bouquet these heirloom Jolly Jester Marigolds make. I picked up an envelope of these seeds from Seedsavers on a whim, and boy am I glad. Although they did take longer to grow and bloom than regular marigolds from the nursery, it was worth it once they really got going.

Below you can see how wild and tall they grew next to my solar powered frog fountain, which I didn't mind at all- no highly manicured, tight in the rows garden for me! They even lept over the fence and twined together with the equally wild tomatoes. The best part about the non-compactness of the plant was the flowers had longer stems than usual, so I was able to make it into the bouquet you see. I also have some drying on a screen for an attractive filler in lavender potpourri I plan to make soon.

Sunday, October 26, 2008

Green Tomato Preserves: TAH DAH!

You might remember these tomatoes from the pre-frost harvest last weekend. There were actually at least twice as many green grape tomatoes but I didn't get all of them in a picture together.

Well it took a few days, but my partner and I finally got it together and turned them all into preserves. This is the first time either of us had ever attempted real home canning. Athough my husband's father has, and hubz had watched him do it. So at least that was something.

We followed the Bell Blue Book as well as we could, but not as well as it said we should. I noticed on like every other page it admonished the reader to follow the recipes exactly and use absolutely no substitutions. We couldn't really do that though, as we don't have a scale. So we had to approximate measures as best we could. That was the toughest part. The other thing it said was to use the fruits and veggies immediately after picking them, which we didn't manage either. I'm hoping we did ok though, and won't get botulism. It seems to me as long as their is plenty of vinegar and lemon in there, and they were boiled long enough, we're probably ok. I hope.

The first thing we did was separate out the red tomatoes, and place them in boiling water for 30 - 60 seconds. Let them cool, then proceeded to peel, chop and deseed. Finally they were placed in a Ziploc freezer bag, and as much air was squeezed out as possible. Here they are after freezing for two days, looks pretty good. I think they'll make a good sauce in November.

Next we took care of the green grape tomatoes. Well, hubz actually did this one while I tried to work on my paper. As described in the last post about this, we used the dilled green tomato recipe from the blue book. The biggest problem I anticipate here is that my partner, bless his little heart, didn't realize a head of fresh dill equals more than a single sprig. When he was already done I looked in the refrigerator and noticed half the bunch of fresh dill we bought was still there. If it had been me I would have just split the whole bunch up between each jar, but what are you going to do. I guess they'll just be more tart than dill. Hopefully they'll be edible! Here are pics of them boiling and the finished product.


Last but not least we tackled farmgirl's green tomato relish. Once again hubz mostly took care of it, but this time I hovered a bit to help when he needed it. It was a lot of chopping, that's for sure! But in the end we used up everything but a few cayennes and habaneros, so it was totally worth it. We didn't want to use quart jars, because it would be hard to eat all of that just between two of us in a week or two once it was opened. So we had to use half pint jars because that is all they had left in the store. I think this will probably work out better since the "relish" really came out like a thick, intensely flavorful sauce.

There was so much of it, we couldn't fit it all in one boiling water bath so put the leftover in a quart jar and ate that for dinner on a Mexican pizza. Thank goodness, after all that work, it really was super delicious! Somehow a couple slightly pink tomatoes got leftover, and a half-ripe orange bell pepper. So I also chopped those and cooked them with a box of Spanish Rice a Roni instead of a can of tomatoes, which again I am happy to report tasted extremely yummy . We had that on top of toasted hard corn tortillas, with black beans, corn, black olives, the relish and fresh cilantro. The thickness of the relish was slightly applesauce-y, and with just the right amount of sweetness from the apples too. I really enjoyed the texture since usually store-bought green tomato salsas are too watery. But it still had that great green tartness. MMM it was good. Those 3 MMMs are for the three pizzas I ate!

Saturday, October 25, 2008

The Cucumbers' Journey to Refrigerator Pickles

This is an old picture from July when the cucumbers were at their peak. Back then it was summer so I was outside all the time, and not on the computer. Unlike now that it gets dark so early I can't get off this thing. Boo I hate winter.

Anyhow, it was pretty exciting at the time. My first attempt at any sort of home preserving! These were just refrigerator pickles, that did not involve any actual processing, so they only lasted a couple weeks. But they sure were absolutely delicious!

On the left are the white cucmbers I got for free from Park Seed. On the right were long thin green cucumbers. I'm not sure what type exactly, but they were a nice healthy plug plant from the nursery.

Here is the recipe I used, from Stellamarie over at the ppk:
This is my friend's mom's easy and yummy recipe for some damn fine 24 hour pickles. It works with carrots, green beans, cucumbers (unwaxed), cauliflower, etc etc:
Boil together:
6 cups water

1 cup plus an extra splash or two vinegar (white vinegar)
1/4 cup kosher salt

1/2 cup sugar (it doesn't make sweet pickles this is just to mellow it out. if you want sweet pickles you need more sugar)


Boil til dissolved and cool fully (you don't want to cook the veggies when you pour this on them later) Meanwhile, peel a whole bunch of garlic cloves (6 or 8 per jar) and have your veggies washed and cut into pickle size. Also, plan on about 2 herb boxes (the boxes from the store) of dill for every three regular canning jars. Smash the garlic cloves a little bit with the flat side of your chef knife if you really like garlic. When the vinegar mixture is totally cooled off, put a few garlic cloves, small handful of dill and handful of veggies in the jar. Then more garlic, more dill, more veggies, making layers. Repeat layers depending on how big your jar is. Pour vinegar mixture on top to fill, then put in frig for 24 hours. Eat delicious pickles. You can re-use the brine 2 more times, just put more veggies in.

I used just regular course sea salt because it was all I had, plus a combo of fresh & dried dill + dill seeds, garlic, jalapeno, & peppercorns. I also added red onion sliced thin.

I made one other quart jar in addition to the two in the picture and gave it to my Dad. I think he was an unbeliever at first, but ended up loving them! He has mentioned how good they were several times since then.

Unfortunately I didn't realize that cucumbers will only produce for so long, and you should do successive planting if you want them to last all season. Mine died out at the end of August. Here are a succession of garden shots so we can see their progress over the season:

June 23rd: Getting There!
July 25th: Awesome!
July 27th: Yummy!August 16th: On their last yellowing legs.Sept 3rd: totally dried up. :-(

Friday, October 24, 2008

Seeds Grown in 2008

Here's the specific list of seeds that I grew this year. I have a lot leftover for most of them. I wonder if they will still be good to plant next spring, or do I have to buy new ones? Maybe putting them in the freezer will help, like how I keep my seeds for sprouting. I have no idea, guess I gotta research an answer. Some definitely grew better than others, so I noted the results below as well. E = Excellent, A = Average, P = Poor

Spring 2008. All were direct sowed outside in the beginning of May unless otherwise specified.

Seed Savers Exchange:
  • E = Velvet Queen Sunflower - Helianthus annuus. These were great, will definitely grow again.
  • A = Five Color Silverbeet (Rainbow Swiss Chard) - Beta vulgaris. Slow to grow but good once they did.
  • A = Scarlet Runner Bean - Phaseolus coccineus. Grew well, looked pretty, but did not produce enough beans.
  • A = Early Scarlet Globe Radish - Raphanus sativus. These grew well but too quickly. Had gigantic tall spiky leaves but tiny, tough roots. Only a few were edible.
  • A = Jolly Jester Marigold - Tagetes patula. Slow to grow but nice once they did.
  • P = Empress of India Nasturtium - Troaeolum minus. These were a real disappointment. Grew about 3 inches tall, bloomed lovely red flowers that tasted wonderful, then mysteriously died. Maybe b/c they were in hanging pot on the porch?
  • P = Spearmint - Mentha viridis. Awful. Grew 2 inches tall if that, then died. Maybe b/c they were also in a hanging pot on the porch.
  • P = Cilantro - Coriandrum sativum. A few managed to grow about 6 inches tall, then died. Did not reseed.
  • P = Grandma Einck's Dill - Anethum graveolens. A few little seedlings grew about 2 inches tall, then died. Did not even go to seed.
  • P = Scarlet Nantes Carrot - Daucus carota. These grew, but the carrots only ever got about 1 or 2 inches long, and thin. Maybe b/c they got overshadowed by peppers and didn't get enough sun though.
Park Seed:
  • E = 5557 Cucumber Pearl Hybrid. These were awesome, totally unexpectedly, since they were included in my order for free. Germinated two plants inside in peat pots, then planted outside when they had two or three leaves. They ended up growing just as well, if not better, than a super healthy nursery cucumber I planted right next to them.
  • P = 5660 Spinach Malabar Red Stem. Direct sowed outside in June. Did not germinate at all.
Sean Conway (from Target):
  • E = Parsley (plain) - Certified Organic, Single Italian Flat leaf. This plant grew extremely well. Seemed a little slow at first, but this was probably normal. I bought a curly-leaf plug plant from the nursery and in the end, they both grew to be equally large sized plants.
  • A = Calendula Oktoberfest. These seemed very slow to grow, and most did not germinate. I planted many seeds but only 4 mature plants resulted. These took a long time to bloom, like 3 months. Finally really blossomed in October, oddly enough now that I look at the name! But once they did, they were great.
Purchased but never planted:
  • Seed Savers Historic Pansies Mixture Viola x wittrockiana
  • Park Seed Delosperma Floribunda Stardust
  • Sean Conway Organic Lavender
Fall 2008. All direct sown outside on the first weekend of August:

Seed Savers:
  • E = Early Scarlet Globe Radish - Raphanus sativus. These were fantastic in the fall. Nice big roots and healthy leaves. Delicious! Must have just been too hot for them in the summer.
  • A = Lacinato Kale - Brassica oleracea. These grew quite well, but got eaten by imported cabbage worms. Also, some plants are still small regardless of worm damage.
Burpee:
  • E = Purple-Top White Globe Turnip. These grew well and were absolutely delicious. Can't wait to grow them again.
  • E = Mesclun Salad Mix (Black Seeded Simpson, Red Salad Bowl, Lollo Rossa and Royal Oak Leaf Lettuces, plus Arugula Rocket and Radicchio Red Verona). Easy and delicious winners.
  • E = Rare Red Leaf Romaine Lettuce- Silvia. Easy and delicious winners.
  • E = Spicy Mesclun Mix (Lettuce Red Salad Bowl, Mustard Mizuna, Endive Green Curled, Paricchio Red Treviso and Arugula Rocket). Easy and delicious winners.
  • A = Organic Detroit Dark Red, Medium Top Beet. These were yummy but very small. The whole crop only made 9 baby beets.
  • A = Dark Seeded Early Perfection Pea. Super delicious, but average growth and production. Got about 30 pods then no more grew.
  • P = Spinach, Baby's Leaf Hybrid. Nearly 3 months after planting still only3 inches tall. Most did not even germinate.

Thursday, October 23, 2008

My Un-gardeny Freezer

So, back on Oct. 16th Jeni Treehugger tagged me, so I've got to show a picture of my freezer, describe its contents then tag 5 other bloggers. This was the original brainchild of Billy from Vegan Talk. My freezer is kinda scary, and not so garden-y, but here goes.

The only thing I have from my garden in the freezer is two ziploc baggies of parsley, which you can see I placed right in the front on either side of the ice cube trays on the bottom shelf. Hopefully next year the garden will be bigger so we'll have to fill the freezer with frozen garden veggies instead of the gianourmous veggie mix bag from Costco! At least the good news is that big bag has been sitting there forgotten all summer, replaced by fresh garden produce.

(I feel I should also explain why there is food and a big white bag of store bought ice in the ice cube machine section- it is broken. /obv. We inherited this refrigerator with the house when we bought it in March, and since it works otherwise and refrigerators are expensive, we're making do.)

Some other items in there include boca burgers, bombay curry veggie burgers, amy's pot pie, bagels, soft pretzels, hasbrowns, tater tots, Trader Joe's 'chiken' nuggets & 'meat'balls, homemade butternut squash soup, some seeds for sprouting (ok that's kinda garden-y too), leftover lentils, peas, spinach, fruit ice pops & pierogies. There is other stuff in there but honestly even I don't know what it all is. One of these days I guess I should clean it.

Here's a pic of the outside too, since it is more fun than the inside. I love my magnet collection, and the picture of the newborn baby that two of my oldest friends just had in September. You can see her hair even in this tiny pic- toooo cute!

What I'd really like to point out though, is the awesome Grow Peace magnet. My mom actually bought it for me and she doesn't know about this blog (she's old school and doesn't even want email). LOVE IT!! Thanks Mom! Maybe now I'll have to show her this post next time I see her. Here's a close up with a big tray of the green tomatoes we harvested over the weekend on top (which didn't quite make it into jars last night).
Now I gotta find 5 other bloggers to tag. Who should they be? I'm really new to all this blog stuff...I never knew there were all these blog games and activities until veganmofo!

Update: Ok I'm done. Tagged:
1. Vegan Dance if You Want To
2. Typing While Eating
3. Vegan Coach
4. The Elizavegan Page
5. The I-40 Kitchen

Wednesday, October 22, 2008

Green Tomato Tonight

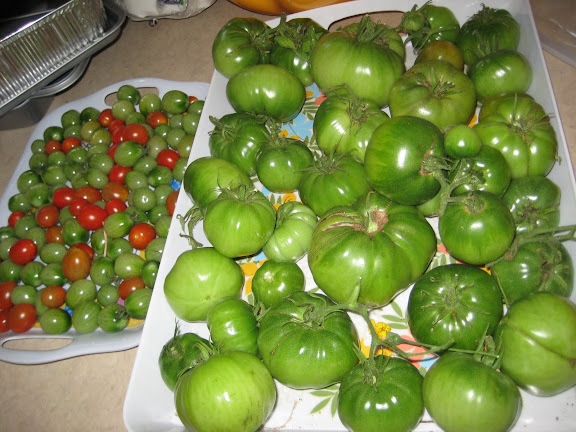
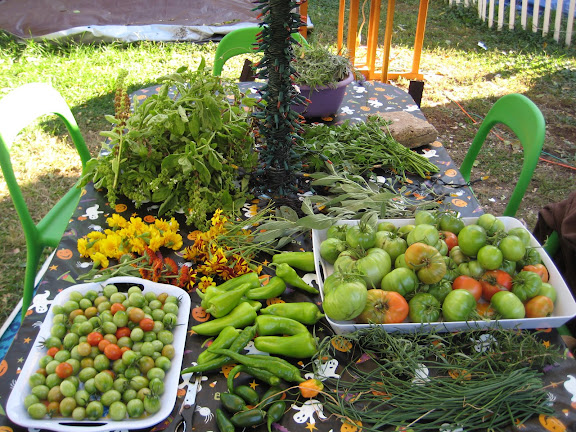
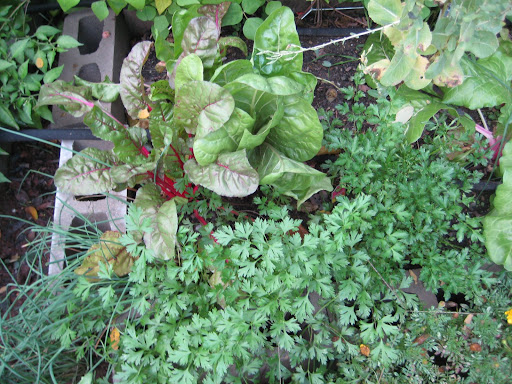
I took the next two days off from work. HOORAY! I wish it was to hang out with my dog in the backyard and cook, but unfortunately I've got a lot of writing to do for school. However, tonight is time to let loose and play a bit so I'm going to do something with all of those tomatoes and peppers we harvested over the weekend. Still trying to decide exactly what recipe to use, but it will be some kind of green tomato salsa or relish. This looks like an interesting recipe, made with green apples:

http://foodiefarmgirl.blogspot.com/2005/09/saving-harvest-green-tomato-relish.html
Pros: we have all the ingredients and it sounds yummy. Cons: We'll have to buy small jars.

Or, there are these options from the Bell Blue Book:
Red Tomatoes Packed in Their Own Juice:
Pros: uses up our red tomatoes and we have all the ingredients and jars. Cons: None. p. 22

Piccalillli or Green Tomato Relish:
Pros: We have all the ingredients, if you include a gianourmous head of cabbage we got a couple weeks ago in Lancaster, except celery seed. Cons: We only have ground celery seed, not whole like the recipe calls for and the Blue Book says not to substitute. The cabbage is old, though it still looks good. p.52

Dilled Green Tomatoes:
Pros: We can use the green grape tomatoes for this one. Cons: It calls for canning salt and fresh dill or dill seeds, but we only have kosher salt and dried dill leaves. p. 54

OR
Pickled Green Tomato-Hot Pepper Mix
Pros: Uses all our hot peppers, and we have all the ingredients. Cons: Calls for 4 pounds of peppers, but does not say how many peppers that would be, or how many cups, etc. and we have no scale. p. 84

So my little analysis here tells me that we probably need to make at least three of these to use everything up. The red tomatoes in their own juices for sure. The Dilled Green tomatoes is my second choice, if we can find the right spices, or just take our chances with the substitutions. The final choice would be between Pickled Mix or Picallili. Maybe the thing to do is to go to the store and see if we can get whole spices, if not try to get small jars, and if neither of those work then try with the substitutions. Sounds like a plan to me, I better get on it!

Will update the blog with the results as soon as they're done!

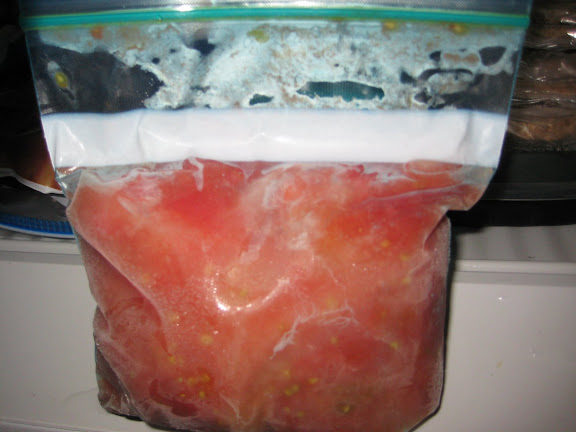
UPDATE: Well, after the store last night I was too tired to do all of this. I'm procrastinating my schoolwork and trying again tonight. Instead of canning the red tomatoes I've decided to freeze them. It will be easier and maybe even tastier. I got these instructions once again thanks to a thread on theppk. com- http://www.pickyourown.org/freezingtomatoes.htm The hardest part is going to be skinning the grape tomatoes but there are only a few red ones so that should be fine.

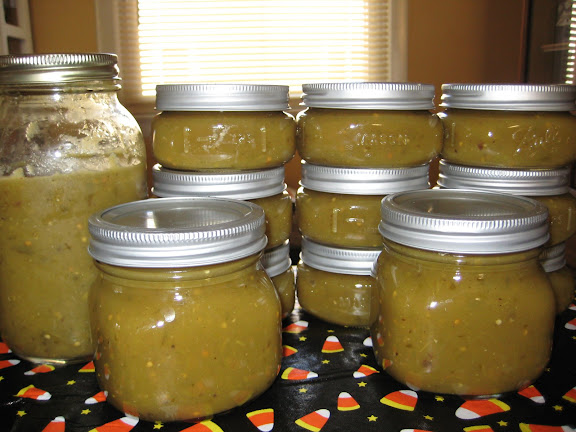
We did manage to buy the very last pack of small ball jars at Target so I'm going to make a double of farmgirl's relish recipe. It will have to be that one instead of the Picallili b/c it turns out the cabbage had grey moldy-looking spots on it. :-( Oh, how I hate wasting food, but I just didn't have the time to cook more than 1/4 of that great big cabbage.

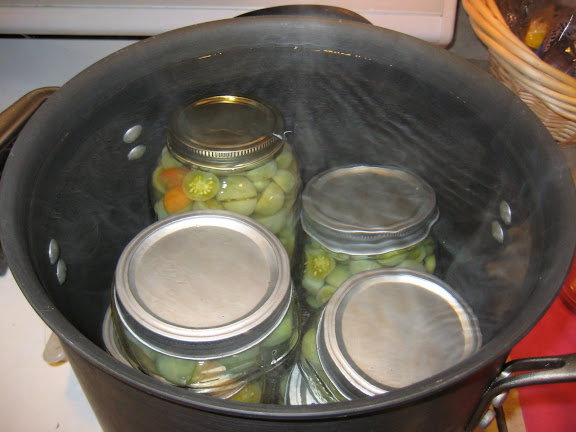
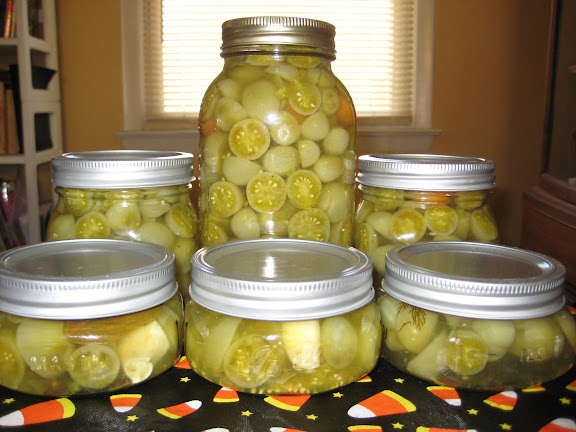
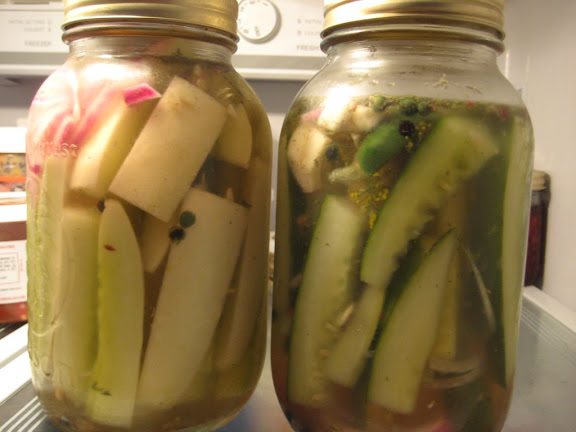
We're definitely also going to try the dilled green tomatoes recipe for all of the green grape tomatoes. I have no idea what they'll taste like, but I'm hoping they'll be kind of like tart dill olives that I can put in salad this winter. We couldn't find whole dill seeds but were able to get fresh dill instead so, that's the new plan. Once again, I better get on it.

Update 2: Oh My Garden. Farmgirl's green tomato relish recipe is DELICIOUS! We finished that, dilled green grape tomatoes and froze the red tomatoes. Will post details and pictures soon.
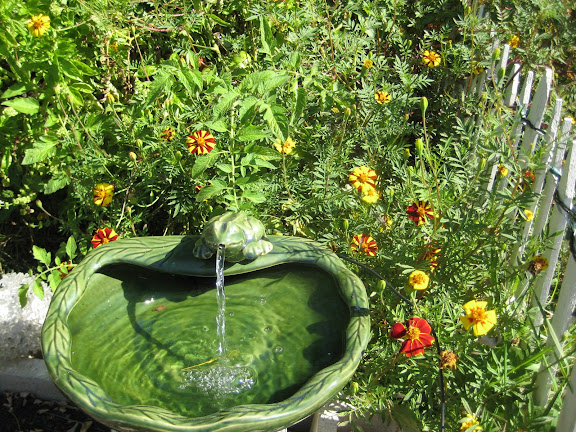
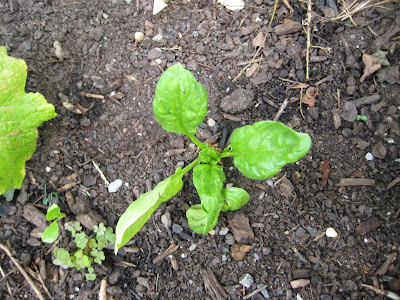
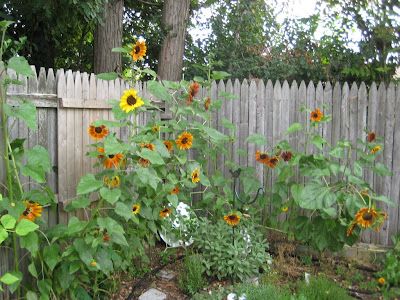
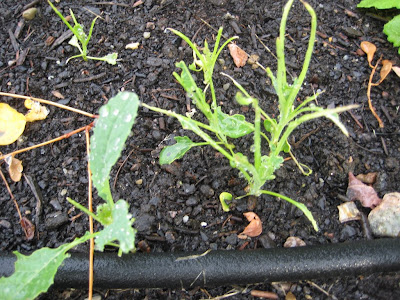
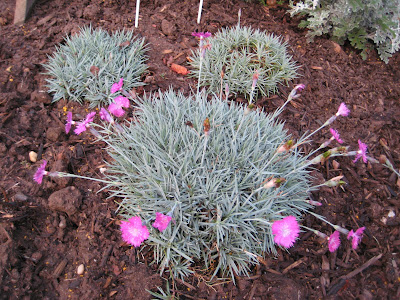
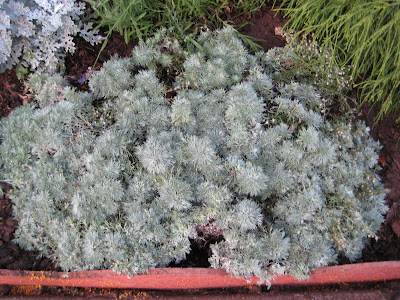
Tuesday, October 21, 2008

Sweet Peas!

Ahh, sweet peas, so cute and absolutely delicious. They were probably my favorite fall crop this year. I planted them from seed around August 3rd. It was around 12 seeds, two on each side of the three trellis legs and two in the middle of each side. Here you can see what they looked like on September 6th, and a close up of the first beautiful butterfly shaped white flower:


Unfortunately, I only planted one trellis with them, and harvested maybe about 30 pods or so altogther, 5 - 10 at a time on a couple different days. It wasn't nearly enough to cook anything with, so we just ate them plain straight out of the pod. Amazingly enough, that was the first time I ever had a pea out of the pod in my life. So good! Next spring I am going to plant about 10 more of these plants!!

As you can see from this picture taken on October 6th, the plant never really got very tall. The leaves also turned yellow along the bottom. I'm not really sure why. There are no new flowers or pods on it now, so I assume it is done for the season. Bummer.

P.S. My garden survived the first frost thanks to the measures taken in the last post. Or, maybe it didn't end up frosting is more like it. When I let JJ out around 8AM, the ground seemed damp but not icy. Well, at least it survived! It may frost again tomorrow night so we'll see how much longer it can last.

Why didn't my spinach grow?

This picture from October 5th shows a spinach plant that was sown from direct seed on August 3rd. So it is a full two months old, but still only stands about 2 inches tall. What gives?


This is the first time I ever tried to grow spinach so I have no idea what went wrong. There are 3 or 4 other spinach plants that were all planted at the same time, and they're all still only about 2 inches tall even now. One of them was overshadowed by the turnip next to it, but the others seemed to get plenty of sun so I don't think that was the problem. They don't even seem eaten by the cabbage worms either- they're just tiny. Guess we won't be harvesting any spinach this year.

Sunday, October 19, 2008

Do I love my garden or what?!?

Here it is, all covered up for protection from the possible frost. We worked on it all day. I hope this helps. Of course, knowing Murphy's law, we probably did all of this for nothing. But better safe than sorry I figure.

We really need to get a thermometer for the backyard so I can tell the difference between the local forecast and what's going on in the microclimate of my garden. The Master Gardener's hotline told me it can vary widely, depending on fencing, whether or not you are on a hill, etc. At this point I really don't know how it is here. Although I can tell you I am sitting outside right now next to a blazing chiminea and it is cooooold! (Yeah, my husband is a computer geek and he set us up with super high speed wireless internet out back. Pretty cool huh!)

We also harvested everything we could. Well not quite everything, we purposely left some green tomatoes, basil, peppers, etc. to see if they would survive as an experiment. I didn't harvest any thyme or oregano either, I figured they'd weather the frost and give me a little more time to do it next weekend. There still sure was a lot to process though! We froze the parsley, will puree the basil with a little oil and freeze (hubby is working on that right now), diced the chives and tarragon for butter (earth balance vegan butter of course), put the rosemary in red vinegar, set the lavender, sage, calendula and marigolds on screens to dry, and saved the peppers/green tomatoes for salsa and roasting tomorrow. PHEW!

As for the habaneros, we picked the plant that had the most pods closest to being ripe and pulled the whole thing out of the ground. Then put it in a bucket filled with water and placed that in the basement. As mentioned in the last post, from what I read this should make them turn ripe quickly. I hope it works! We left several other plants in the ground and covered them so hopefully they will survive too. Here's the habanero in the bucket, and my dog JJ. Don't worry, we didn't let him eat any. :-)

Possible Frost Tonight!

Oh no!! The little weather gadget I just added to my blog says areas of possible frost tonight. What am I going to do?? What am I going to do?? **runs around in circles waving hands over head**

Wish I already had that Agribon, which has around 4 degrees of frost protection. At least I do have some garden burlap and sheets. I think I'll definitely cover the lettuce and and peas. Guess I might as well try to throw something over the tomatoes and peppers too.

Luckily we worked on the garden for a few hours yesterday to harvest all we could just in case this happened, so there isn't much left on the vines. But there are still quite a few green tomatoes and lots of lettuce. We had so much lettuce we cut enough for several huge salads for us and a big bag for the neighbors, and there is still lots left. I hope they survive!!! I better harvest my herbs too, didn't have time to do that yesterday. I'm going to use them for potpourri, flavored oils and vinegars, and herb butter.

I guess we'll see what happens!

update: I just went outside and there really are a lot of green tomatoes and habaneros. A lot more than I thought. I wonder if I should pick them all? Man, I really don't have the time for this today...sigh.

I did a little research and it seems I probably should pick most of the green tomatoes. The habaneros may survive with covering. http://forums.gardenweb.com/forums/load/pepper/msg101812265303.html I think I'll try picking some and leaving others as an experiment (and time saver).

Friday, October 17, 2008

Ode to Sunflowers

A garden of Sunflower beckoned to me -Come join us, my lady, and joyous you'll be!
We're large ones and small ones, some dainty and fair,
And even some delicate to wear in your hair.
We follow the sun, swaying slowly without a care,
We have a new dance that with you we will share.
A Garden of Sunflowers - author unknown

Here is a montage of the sunflowers I grew this year. They are all the same heirloom variety, which I can't remember at the moment but will look up when I get home. I picked this variety because the picture on the seed packet was maroon like the last flower in this post, but in the end I love how they came out all different colors. I will definitely grow these again next year, although I guess I have to find another spot since I read that you should rotate sunflowers. I saved some of the seeds, but we didn't eat any. Maybe next time.


Thursday, October 16, 2008

Poooor Kale

I was so excited to have fresh heirloom lacinato kale growing into November. Sigh. Unfortunately this is what they looked like on September 3rd.


I have about 6 plants now, and although they are a little bigger they still are all eaten up just like in the picture. It is the darn imported cabbage worms. I guess they like kale as much as I do. I've been pulling them off the kale at a rate of around 6 or more every other day.

As mentioned in my last post about these evil catepillars, I went out and bought BT- the organic pesticide that is supposed to stop them. But after buying it I read some stuff that really made me worry about using pesticides, even if they are organic. So I'm just chalking it up to experience this year, and trying to pick off as many as I can by hand.

Next year I'm going to using row covers. I found this great site with lots of information on it's products: http://groworganic.com/default.html?welcome=T&theses=3550316 From what I have read, it seems the Agribon is the way to go. It is expensive, but since my garden is small I can get the smallest quantity they have which will be about $50 and last for hopefully at least 3 seasons. In that case, it seems pretty cost effective if it keeps these darn worms off my whole crop.

Tuesday, October 14, 2008

Little Bitty Beets


This was my entire harvest of beets on Oct. 10th. I direct sowed the organic Detroit Dark Red, Medium Top seeds on August 1st, but this is all I got 2.5 months later. I don't know what went wrong. The radishes growing next to them were perfect. I may not have thinned them enough, as I just read over at the garden forums that beet seeds are actually a clump of seeds, so several will sprout from one seed and it is important to thin them or you won't get big beets. I definitely didn't do that.

I don't think it was the whole problem though, since some of them had enough space. Maybe I pulled them out too early? Yet they should only take 60 days to mature. Oh well, maybe I will try a different type in 09. They were very tasty in any case. I roasted them whole, didn't even peel them- and ate them with salt and pepper. Yum.

P.S. I just found this link about how to grow beets that might help me later: http://www.urbanext.uiuc.edu/veggies/beet1.html

Monday, October 13, 2008

First Raised Bed Results

This is a picture from August 16th of the first raised bed we built back in April. You may remember it was planted with cool weather chives and lettuce that eventually got attacked by rabbits. In the middle you can still see one of the romaines that were attacked, fully having gone to seed. I left it on purpose just to see if I could get it to reseed itself. The chives also appear in each front corner, nice and tasty. I used them in my cooking quite a bit. The hardest part, in fact, is remembering to cut them since they make a yummy addition to so many dishes! Next year I think I'm going to have to move them into the herb garden though.

After the initial chives and lettuce, I direct sowed some Bright Lights heirloom Swiss Chard and Parsley seed in June and then planted another nursery parsley in July. The flat-leaf parsley on the left, immediately next to the chives, is the one I direct sowed. I'm really impressed with how nicely the parsley came in, considering that from what I have read parsley is normally difficult to germinate. It did indeed take a really long time to grow, but eventually filled in well. Since they are supposed to be biennial, next year they'll probably have to be moved to the herb garden too. I planted both the parsley and chives before I planted the herb garden so that's why they got misplaced.

As for the chard, I thought it grew extremely slowly too. But unlike parsley, that seems to be irregular for chard. You can see the one on the right is much bigger than the two right next to each other on the left. I really don't know why that is, I planted them all at the same time. I read on the gardenweb.com forums that others experienced a slow growing season this year, so that may be why.

In the background is heirloom Scarlet Runner Beans but I'll describe them in more detail another day.

And here is that same bed on Sept. 28th. I haven't seen any baby romaine there so I guess it didn't manage to reseed. I already trimmed the chard once or twice and had a few delicious side dishes from them. I like to just saute them with a little olive oil and minced garlic, then sprinkle with lemon. Yum. Swiss Chard is definitely my favorite green.

I intended to make tabouleh with the parsley this past weekend but didn't get around to it. Luckily parsley freezes well so whatever I don't manage to cook before the hard frost, I can just stick in the freezer for later.

Friday, October 10, 2008

Xeriscape Up Close and Personal

Here are a few close up shots of the individual plants growing in the front garden.


On the top left is Firewitch Dianthus. The flowers would be edible if it wasn't too close to the road. I love how it looks like some kind of sputnik plant with the flowers sticking off it in all directions.

On the bottom right is one of three blue fescue plants. It is the only one that sent up any shoot, which you can barely see is the beige wheat-looking thing shooting up in the upper right hand corner of the picture. Both these and some of the Dianthus were part of an internet order I made from the Big Dipper Nursery in Washington before I had a car. They came bare root (wrapped in a bag and newspaper, not in a pot) and were tiny. I hate to say it but I was extremely dissapointed with the order and will never buy live plants over the internet again.
I was so excited about the adorable blue muppet-looking pompom plant, it was a total bummer when I opened the order and saw a scraggly tuft of grass. Once I got a car and became a regular at my local nurseries, I saw many much larger and vigourous Blue Fescues for about the same price. The larger Dianthus you see in the picture was also bought at a nursery, the ones from the internet are the small ones in the back. Not to mention most of the other plants I got in this order died or hardly grew at all (an Astible- dead, Edible Ostrich Fern- dead, Ornamental Creeping Bramble which they said was a practically indestructible ground cover - dead, Red Trumpet Honeysuckle- barely still alive) Oh well, live and learn. I hope they recover and grow bigger next year.

This is one of the Dusty Millers.
As mentioned, they did not get any yellow flowers at all. I like how it looks a bit like a fractal or snoflake in this picture. The silvery-whitish fur on the leaves serves to reflect the sun, one of the ways these drought-tolerant plants work to conserve water.


I'm going to give Lavender its own special post.


Finally, here is a close up of the unidentified furry plant (I got this one on sale and didn't write down the name). It was maybe a third this big when I planted it, and that was in July. I can't believe how quickly it grew!

Does anyone out there happen to know what it is?

Thursday, October 9, 2008

No-Mow XeriScape: Accomplished


This is a little bit different than the rest of my blog since it isn't edible. Actually at least some of it would be, if it wasn't so close to the busy road I live on.

When my partner and I bought this house back in March, it started out as the tree, grass and bushes you can see in this original post: http://grow-peace.blogspot.com/2008/05/before-shots.html

I don't believe in mowing lawns. I feel that we should use our land to cultivate useable produce with the best technologies whenever possible. Lawns just seem so wasteful to me, with the need for chemicals to keep away "weeds" such as dandelions, which are actually edible, high in nutritional value, and delicious.

So, I decided pretty much immediately upon moving into this house that the little patch of grass in the front had to go. I shared my idea with a friend who is a Master Gardener, who to my surprise said that it would be extremely difficult to grow any flowering plants in this area since it was so close to the street and in so much bright light. He said that it would need a great deal of water to grow in this area.

Based on that advice I did a lot of research on what plants could grow in a low water bed near a road. I discovered this thing called "xeriscaping", which is basically growing gardens that are drought-tolerant and don't require supplemental irrigation. I did water them quite a bit for the first month or two after I planted them until they got established, but now I think they are pretty much on their own. I'm excited for next year when it seems like they will fill it all in very nicely.

What you see above is a recent picture of what I planted back in June (decorated with Halloween stuff obv.). I read that fuzzy, silvery plants are generally good. So I planted Blue Fescue, Lavender, Dusty Miller, and Dianthus FireWitch, as well as some fuzzy green plant towards the far right that I'm not sure of the name. They are all perennials.

The Lavender and Dianthus are edible, but from what I have read, they're planted too close to the road to eat. I asked the local Master Gardeners at the Rutger's Extension office, and they said it should be at least 10 feet, but really more, from the road to be safe to eat.

One thing that really surprised me is that the rabbits in my hood seemed to like the Dusty Miller. It is supposedly poisonous to humans so I'm surprised that the rabbits like it. But apparently they do- after we prevented them from getting the lettuce in the backyard, I guess they were forced to eat the Dusty Miller out front. I put holographic daisy pinwheels around the plants to scare the rabbits away, and that seemed to work pretty well. The Dusty Millers got bigger after that, although they never produced flowers. I'm not sure if that is because of the rabbits or just since it was the first year.

I hope to eventually propagate these plants into the backyard so I can eat them, but for now I figure I can use them as potpourri for holiday gifts. You know, make them into sachels for lingerie drawers and all that good stuff. I have pics of the latest harvest I got, and more detailed pics of the individual plants but for some reason I can't upload them right now.

Wednesday, October 8, 2008

Thank you for your comments!

Gee, I never thought I would be so happy with a couple comments. I started this blog mainly just to keep a record of my gardening notes so I could learn the best things to grow from year to year.

I didn't really expect anyone to read it but family and friends, but I guess VeganMofo is attracting new readers.

Wonderful! I am so glad you all are enjoying it. Thanks again for reading! :)

Monday, October 6, 2008

Fall Lettuce At Night

This is a recent shot of the fall lettuce, from October 2nd. It is illuminated by christmas lights at night. You can see assorted mesclun, red romaine, and spicy mesclun (plus turnips and beets towards the back). Despite the cabbage worms, we still got quite a nice crop.

I'm going to have a garden party this weekend to use everything up before frost. This is the planned menu at this point, though I may adjust it over the next few days:

Menu:
Blood Punch
Pimiento Olive Cheeze & Crackers
Hummus, Babaganoush, & *Tabouleh w/ Pita
Morocan Olives and Oranges w/ Grilled Crostini
Lentils and Lemon w/ more Crostini
Autumn Vegetable Soup (with butternut and/or pumpkin, *turnip & *swiss chard greens)
*Salad w/ *Grilled Beets/Turnips and Moroccan Orange Dressing
Grilled Garlic and Lemon Green Beans + *Peas
Grilled Moroccan Spiced *Carrots
Apple Tart

*all starred items grown in my garden!

Friday, October 3, 2008

Fried Green Tomatoes & Salsa

This is a closeup of fried green tomatoes with fresh salsa on top. All the tomatoes, green pepper, and jalapenos came from the garden. This was the first time I'd ever had fried green tomatoes and wow were they delicious! They were a bit tart but not too much, plus crispy on the outside and soft inside. Just right. I really liked how the citrus in the salsa topping helped to lighten the greasy fried-ness of it. Now that it is fall and we've got lots of green tomatoes on the vine that probably won't turn ripe before the first frost, I'll definitely be making these again.

I used this recipe for the fried green tomatoes from Pamela Cooks! blog. Thanks Pamela.
Here is my own salsa "recipe" though I just make it to taste so I'm just guessing on the measurements:

  • 2 cups chopped tomatoes (it is much better if you have the time to do it by hand, not the food processor)

  • 1/3 - 1/2 cup finely chopped red or white onion, or scallions

  • 1/4 - 1/2 cup chopped italian green frying peppers (or bell)

  • 1 jalapeno, seeds removed and minced

  • 1 or 2 cloves of minced garlic

  • handful of roughly chopped cilantro

  • Juice of 1 lime

  • teaspoon of cider vinegar

  • salt and pepper to taste

Mix all ingredients together and enjoy.

I ate them sitting outside next to the garden as part of a wonderful brunch on a gorgegous sunny Sunday. Pictured clockwise from the top: Grilled Smoky Tempeh (from Veganomicon) on a potato pancake topped with more salsa, swiss chard also grown in the garden sauteed with leftover smoky marinade, red onions and garlic, the green tomatoes, and a homemade white corn muffin. YUM!

Creative Commons License
Grow Peace Dance is licensed under a Creative Commons Attribution-NonCommercial-ShareAlike 3.0 Unported License.
Based on a work at grow-peace.blogspot.com.